In this short post I'm going to show how I remove severe colour casts from slides when they are scanned.
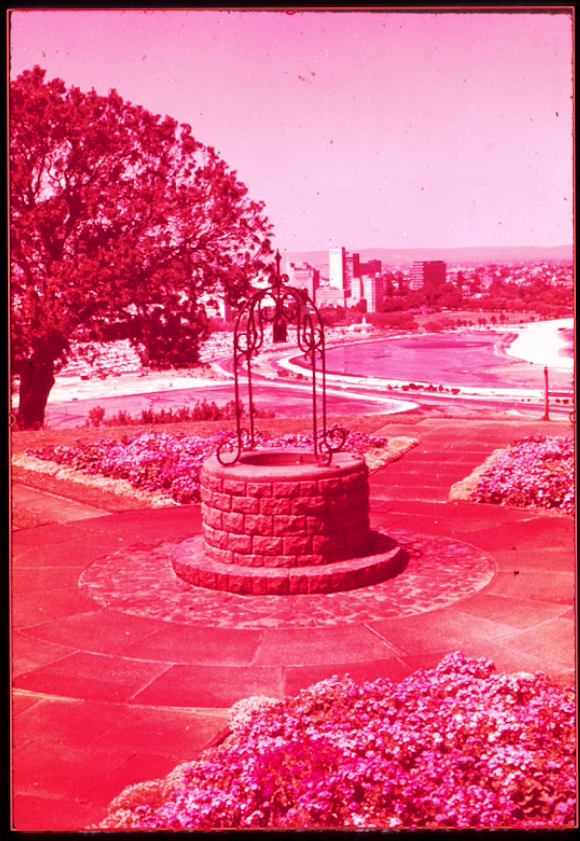
Although many vintage slides have retained a lot of their colour and definition over the years, there are sometimes slides which have suffered and faded badly. Normally, when this happens, it's the green and blue which has faded leaving a slide which is almost completely red.
Although it's not possible to bring these slides back to the point where they look like they did when first processed, it's possible to make quite an improvement during the scanning process, and this post covers the technique I use to recover those slides.
Removing the colour cast
To illustrate how this is done I've made a short video during the import process for an image which was suffering badly.
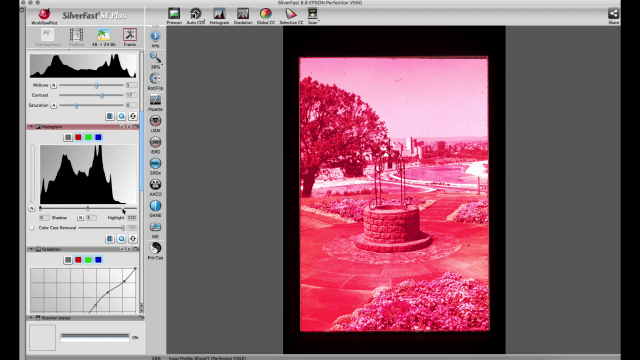
The software I use to control the scanner is SilverFast, which is leagues ahead of the Epson software supplied with the Epson V550 Photo scanner I use for the photos on found-film.
The initial image is shown to the left here where you can see the initial scan before I applied any correction. The video shows the process, but I'll also just outline what is done here to make it clear.
I start with a pre-scan which is used to get the general dimensions of the scan correct and set the crop limits and then zoom into the individual slide. The video below starts from the point I've selected the slide.
Whilst the scanner is carrying out the first scan at proper resolution, I set the crop limits and the file name etc. Then using the histogram control on SilverFast, I set the general peak white and black levels to be correct. This is basically to set the initial values for the colours to also be correct and is achieved by moving the slider to the point the histogram stops. I set the mid point slider to get the overall brightness level correct.
Once the brightness level is set I switch to each of the red, green and blue channels on the histogram in turn and basically repeat the setting I carried out for the peak black and white levels but set each colour separately. In the case of the red channel I drop the mid point slider down to a very low setting.
Once the blue and green channels are set I balance the image with the mid point sliders for each of the three channels, trying to get the best colour balance possible. As you can see from the vide, the blue and green channels tend to be pushed up and the red pushed down. Obviously a different colour cast would be treated differently.
Once the image looks as good as it's going to, I then run the iSRD scan which removes dust spots and blemishes from the image.
Removing Colour Casts Video
Here is the video showing the process - it is quite short, but I would recommend viewing it at 720P or better to see properly what is happening.
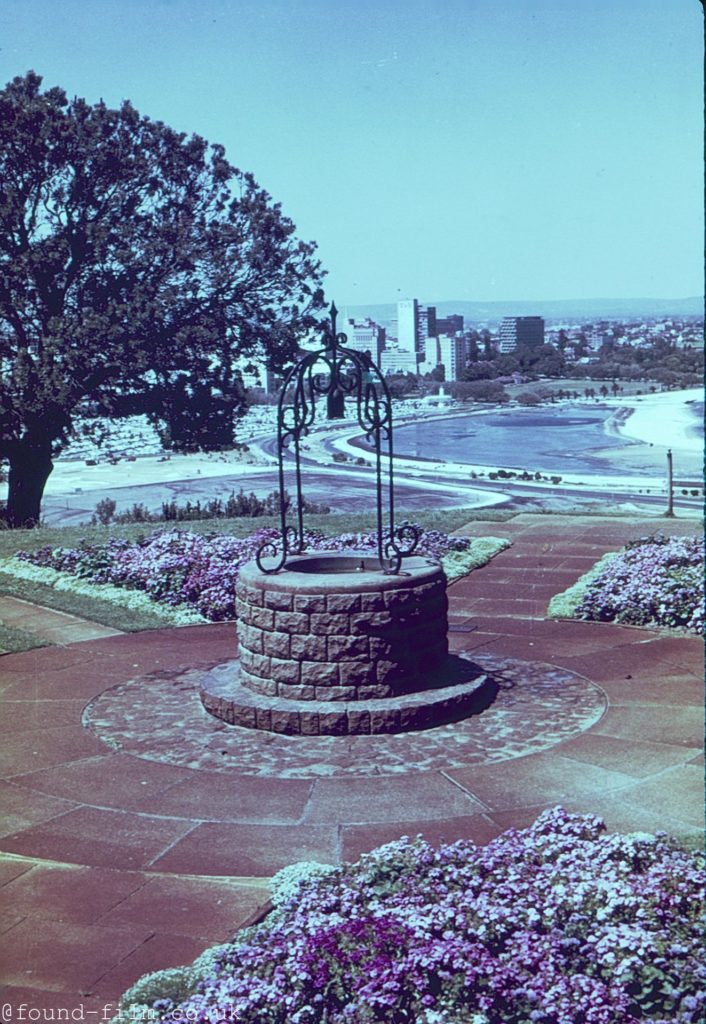
The final image achieved is shown below - it is far from perfect, but it is a big improvement on the original, mostly red image, particularly with the sky colour.
